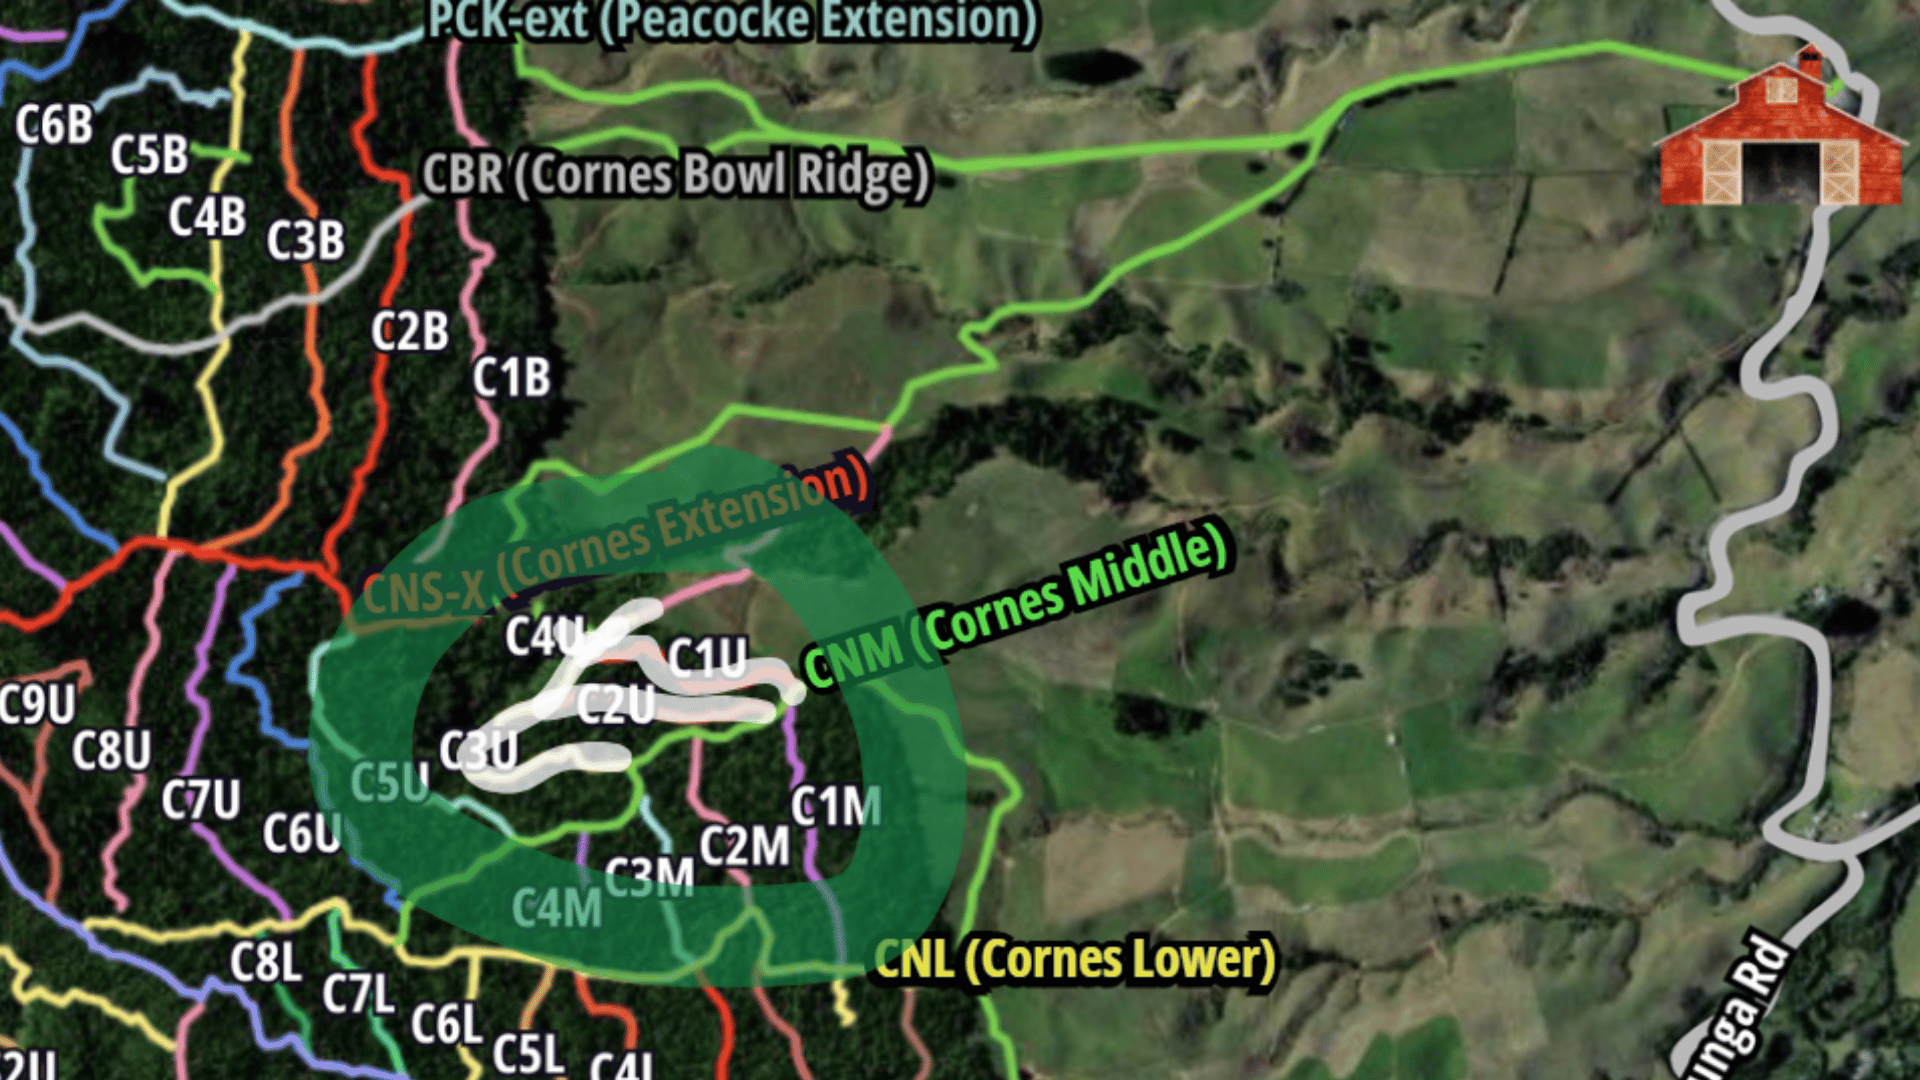
C1U, C2U, C3U (and one bait station on C4U)
(Cornes Upper Area)
This video is the quickest way to explain your lines. It’s worth taking 90 seconds to watch it! If you prefer written instructions and a map, scroll down.
Your lines: C1U, C2U, C3U and one bait station on C4U
Entry point: After our H&S talk, you’ll be driven part-way up the paddock. Cross the narrow strip of bush (the ‘pinky’) to access C3U (or CNM is also an option)
If you start at C3U:
Service the first bait station along C3U
Turn right onto C4U to service ONE station ONLY.
Get back to C3U and do each station on it.
At the end of C3U, you’ll end up on CNM. Turn left/down - don’t touch these bait stations though.
Turn left onto C2U (service these bait stations.)
Walk down/right C3U to the start of C1U on your right.
Service the bait stations on C1U.
You’ll end up at the junction with CNM.
Walk down/left towards the paddock.
Note:
Only service the bait stations on your lines (Do not service any along CNM)
Exit point: Once done, follow the farm track and the pink and green Paddock Walks on Trap.NZ to make your way back to the red shed. It’s a fairly long but enjoyable walk back.